Ahimsa. Non-harming, non-violence. Usually thought of as not harming others, but it can also be thought of as not harming ourselves. Especially in a hatha yoga practice, whose very name means force – forcing the body into a variety of shapes and positions.
This article is something I’ve wanted to write for a long time, and if you’ve ever been to my class, you know I have a million and one tricks up my sleeves to attempt to keep people hinging at the hips, as opposed to rounding through the lower back. My obsession with this rounded back started out young. My grandmother used to frequently throw her back out and be relegated to bed rest until the spasms subsided. For a little kid, this meant not only was my grandmother in pain, but she didn’t get to play with me. Double whammy! At some point in my childhood, I saw some materials that talked about how one could prevent back pain from happening – don’t bend over to pick things up! Instead, bend at the knees and use the legs to lift! It became a mantra of sorts, or just something mini-me liked to share with the entire world.
When I took up my yoga practice in the late 90s, I’m sure this idea of not stressing the back was still deeply ingrained in me somewhere, but it wasn’t at the forefront of my mind. I did my sun salutations and forward bends with little thought to what I was doing. Since I was 18, this wasn’t a huge issue. As the years ticked by, and I began to spend my time sitting behind a desk, however, I started to feel the pull of the muscles in my lower back a little more. That’s when I began to play with the idea of bending my knees and not folding so far to lessen the tug in my back muscles. One day in a standing forward fold, that’s when I had the epiphany – this forward fold wasn’t so much about my hamstrings or getting my head to my shins, it was about letting all of the tension go in my back, and it – felt – so – good! Indeed, there came a little pop or two.
Of course, had I been going to classes all along, instead of following along in a book with scant information, I’m certain someone would have told me to bend my knees. I’m not sure I would have listened; I’m pretty stubborn after all. After many years of practicing, and a few years of classes and studying, I began to understand the why that went along with this. Muscles that have been shortened & lengthened due to our prolonged sitting. Fascia laying down belts of collagen fibers to stabilize our bodies’ new posture. Which, happens to not be a forward bend. There’s a good article here on what happens when you sit, with a slightly sensationalist title.
So back to protecting our lower back. Lower back spasms are caused when a muscle is over-stretched and torn. This can happen to already weak muscles, weak often from sitting. The remedy for lower back pain is to first rest the muscles, to let them heal. The problem with this is resting the muscles can lead to additional atrophy, making them more susceptible to tearing in the future. Thus, many seek out “lighter” forms of exercise, like yoga, to begin to build strength slowly. Which is great, so long as they know how to protect their back as they go into this endeavor. Even for those of us who haven’t had issues with our lower back can benefit from protecting it, since many of us sit for long periods every day.
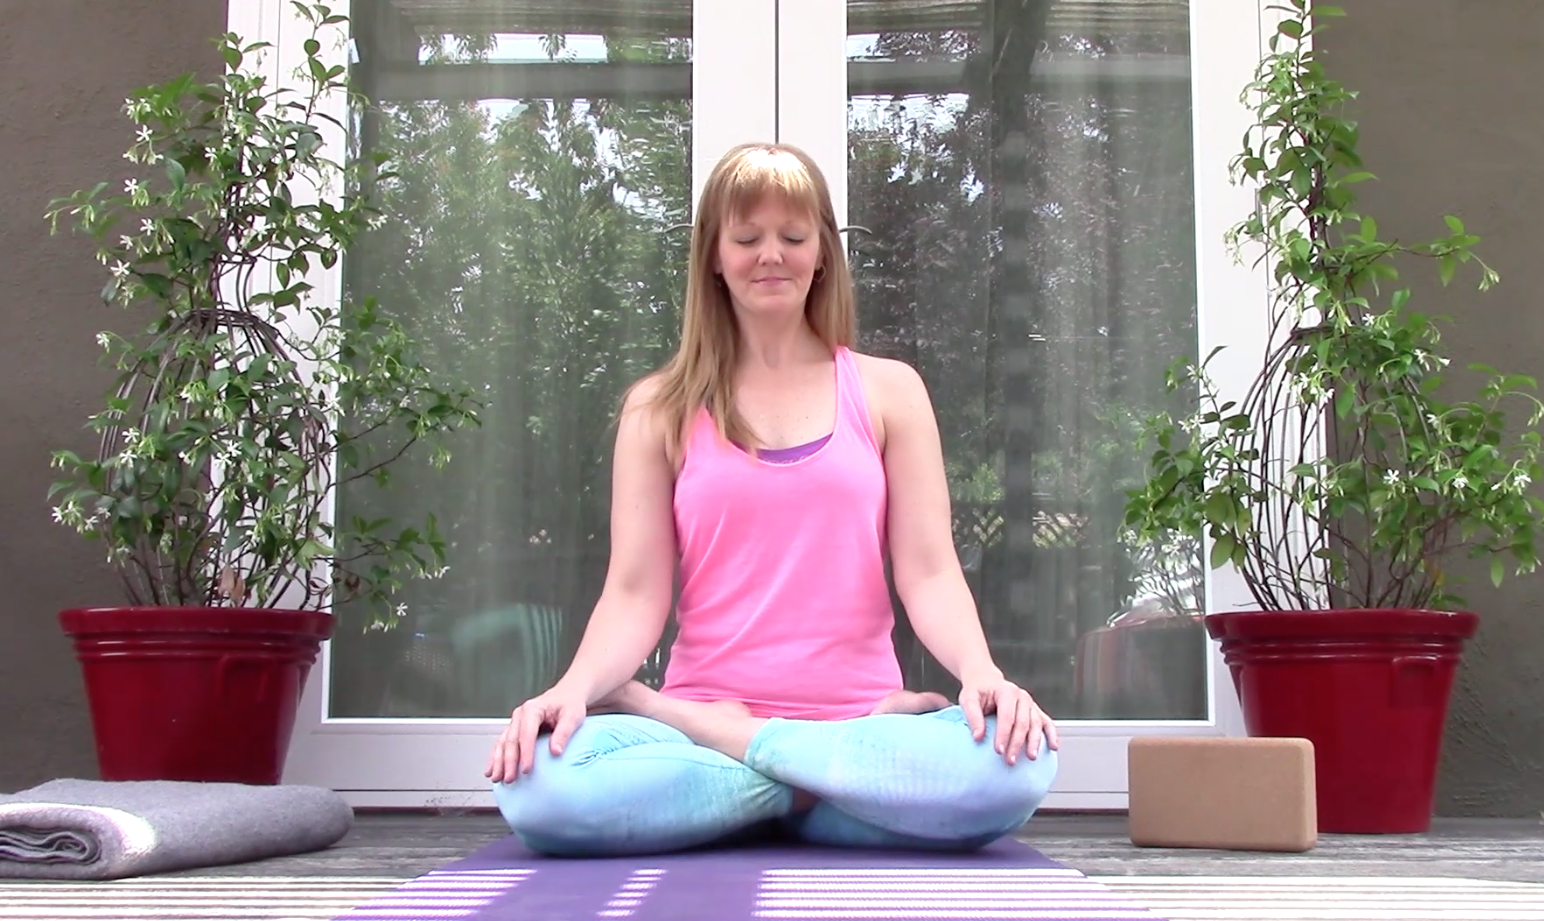
In the video above, I talk about two types of forward bends – seated and standing. I also talk briefly about reclined hand to big toe pose, and how it can be used as an indicator of where our body wants to forward bend to. Below is a brief synopsis of what is covered in the video.
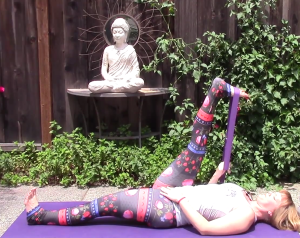 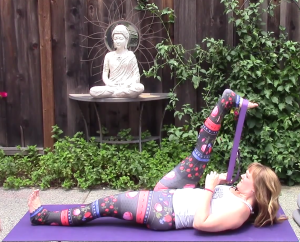 |
Reclining Hand-to-Big-Toe Pose Purpose: The reason I have included a quick look at supta padangusthasana is I find it a great way to see where your body will want to go to in a forward bend if you relegate the movement to the hinge in the hips. It’s also the best position to to stretch hamstrings in without compromising your back. Doing this move first can help you be more mindful in your forward bends of how close your torso will come to your legs before you compensate with another body part. How to get into it: Having a strap or belt nearby is handy, but not necessary. If using, make a loop about 20 inches in diameter. To start, place the belt around the right foot and let it lay off to the side. Recline, flat on your back, legs stretched out hip’s width apart or a little closer. Keep the legs and feet engaged, as if you were in tadasana, only on your back. With your inhale, bring the right foot up toward the sky, keeping it engaged by pushing through the ball of the big toe. Take the right hand to the underside of the belt, so the palm faces you as you grab onto the loop (If you are not using a belt, take your hands behind your thigh or calf and pull the leg toward you). Let the shoulders rest back toward the ground as you pull the belt gently toward you, bringing the leg closer to your torso. Rest here for 30 seconds to 1 minute, breathing slow, full breaths into the rib cage. With the nest inhale, bring the shoulder blades off the ground, letting the head stay relaxed. Take 3 to 5 more breaths in this position. With your exhale, slowly lower the foot and the upper body back to the ground. Repeat with the left leg. Points of focus: Focus on keeping both legs engaged, pulling the toes toward the shins. The back of the thigh on the ground should be pushing toward the ground. The leg in the air should be kept straight if at all possible. The shoulders, neck, and jaw have a tendency to tighten here, so keep a vigilant focus on relaxing the jaw, keeping the neck loose, and letting the shoulder blades drop toward the ground. |
   |
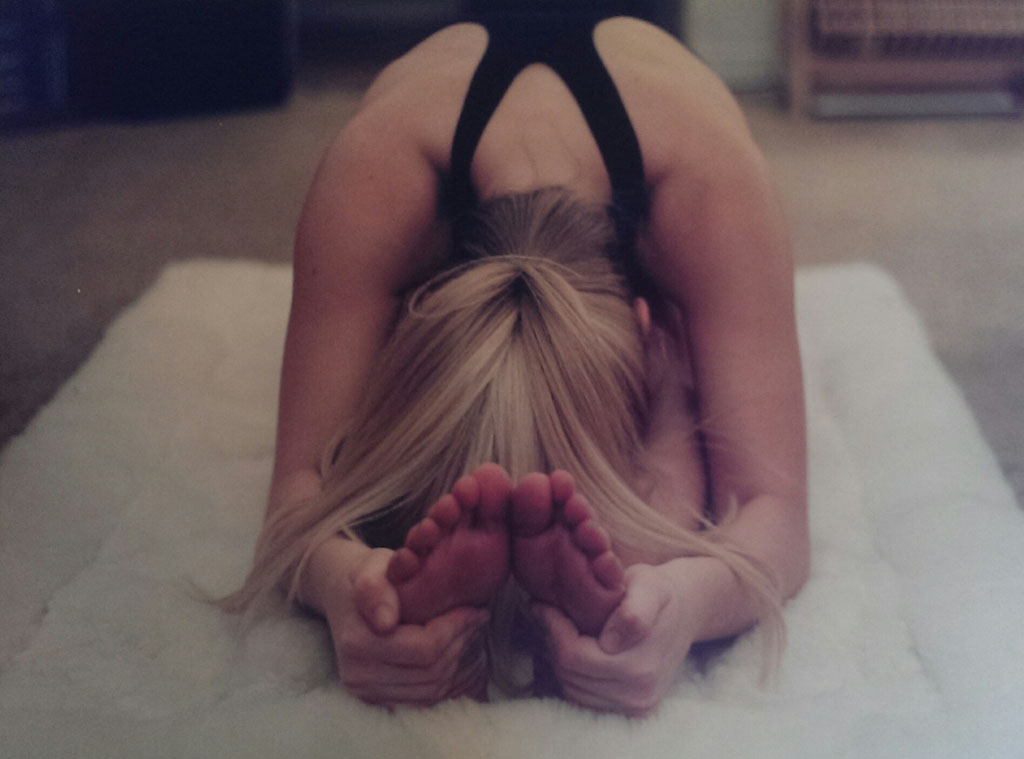
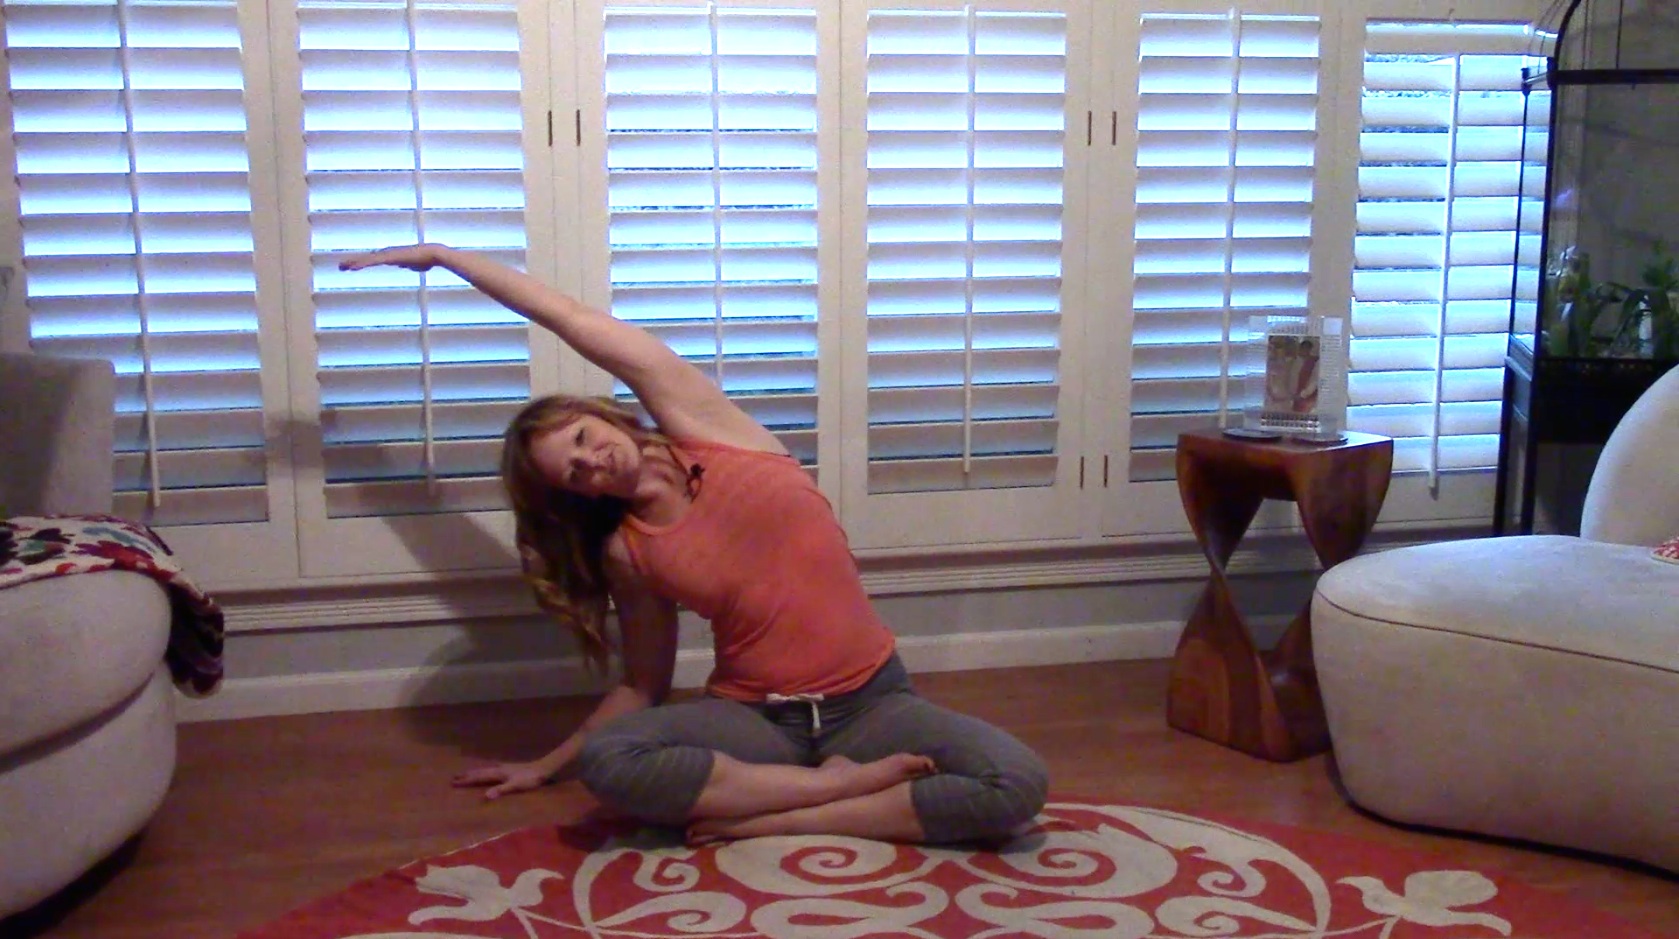
Seated Forward Bend Purpose: There are many purposes to seated forward bend, but to simplify, I will note the main benefit I find is to lengthen the entire fascial back line of the body. Practiced regularly, this pose will bring increased flexibility. How to get into it: Take enough height under your seat so that your torso can be 90 degrees in relation to the ground, ensuring that you are not starting off rounded through the back or making your core muscles do extra work to hold you up (see the video for a more detailed explanation). Take the finger tips by the side of the hips, and push into the ground to feel a lift off the lower spine from the pelvis. Keeping this lift inhale, bringing the hands overhead. As you do so, feel the waist and the rib cage lift as well as lengthening the mid and upper spine. As you exhale begin to tilt the hips forward, keeping the arms in line with the ears and leading the way down with your breast bone as opposed to your head. Inhale, rising back up. Exhale down again, the same way, lengthening the arms & torso out as far away as possible while still keeping the arms in line with the ears. Inhale up once more, and as you exhale the same way, find the furthest point the hips want to hinge to and the most length you can in the torso. Inhale, staying in this position, and with your exhale, let the hands relax by the side of the legs or on top of the legs. Ensure you are keeping the legs engaged, toes pulling back toward the shins. As you begin to rest in this posture, ensure the shoulders and the jaw are relaxed. After a couple of breaths begin to relax the head toward the ground, taking care to keep the rounding only in the neck and upper spine, and not letting it creep into the lower spine. Rest here for at least 45 seconds, but slowly working your way up to 4 – 5 minutes as you find more comfort in the pose. When you’ve successfully let go of tension in the upper body, you can turn your focus to letting tension in the hamstrings release with each exhale. NOT the focus: I feel this is important to say; the focus of this pose is not to get your head to your legs or your hands to your feet. In time, as the back line of the body lengthens, this may happen, but do not force it. Keeping engagement through the feet and lengthening the torso away from the hips while hinging forward will help you achieve the lengthening without bringing extra tension into the upper body. Points of focus: Releasing tension in the neck, shoulders, and jaw. Lengthening the torso out away from the pelvis. Toes pulled toward the shins while pushing out through the big toe mound. Focusing on relaxation through the hip joints and the hamstrings. Keeping a neutral curve in the lumbar spine. |
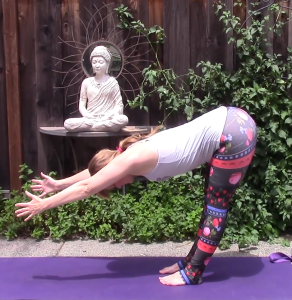 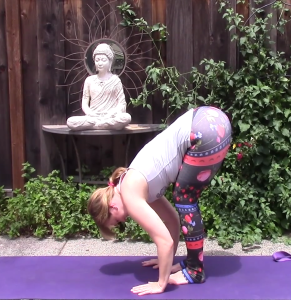 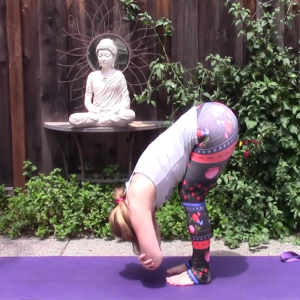 |
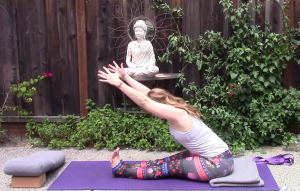
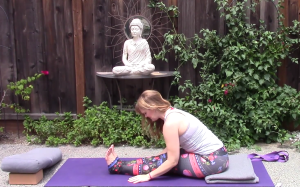
Standing Forward Bend Purpose: Releasing pressure in the spine by reversing the direction of gravity on the vertebrae. How to get into it: From tadasana, inhale and bring your hands overhead, stretching through the side body. As you exhale, begin to hinge at the hips, letting the torso come toward the ground as the hips move back in space, keeping the arms lengthened out by the ears and the heart leading the way toward the ground. When you’ve reached a place where the hips will no longer move forward, bend in the knees, letting the torso rest onto the thighs. From here, you can let the hands come to the floor, to blocks, or you can take the hands to either elbow and dangle, as shown in the third picture. With your exhale, let the shoulder blades and neck relax, rounding a little toward the body. Again, take care to feel no tug at the lower back muscles, adapting either the placement of the hands or deepening the bend in the knees to relieve any tension felt. To come out of this pose, take the hands to the hips, elbows pointing toward the sky. Bend in the knees and raise the torso up from the hip joints, coming back to standing. NOT the focus: I feel it also important to say here, the focus is not to bring the hands to the ground or the head to the knees/shins. Use blocks if needed to make up the distance between the hands and the ground whether holding this posture or transiting through in a sun salutation. Points of focus: Grounding evenly through the feet. Bending in the knees enough to let the spine relax and begin to feel the effects of gravity creating space between the vertebrae. Letting the neck relax. Slow, deep inhales and exhales. Focus on a slightly extended exhale if possible. |
While this is a lengthy article, as I mentioned in the beginning, keeping the lower back muscles happy is something I’m rather passionate about. Please note – this article talks about lower back pain in relation to the lower back muscles only. If you have other issues that cause you low back pain, such as an issue with the discs, or a contraindication to forward bending, such as osteoporosis or blood pressure issues, as always, you should follow your health care provider’s advice. The information provided in this video & article is not a substitute for professional medical advice or for treatment of specific medical conditions.
Always be conscious of your body and how it is feeling today, in this moment. If you feel any pain, discomfort, or dizziness, you should stop practice immediately, and seek medical advice as appropriate.